

A REST API is an API that conforms to the constrains of REST architecture and style. REST stands for representational state transfer. It was created by Roy Fielding. The cool thing about REST APIs is that they're cacheable, stateless and consistent. You can read more about it here. A simple way to look at an API is viewing it as an interpreter between the computer resources, or web services and a client, or user. It's also a way for organizations to share information securely. Say you want to get the ten most rated movies from IMDB. IMDB can share this information to you through an API, without disclosing sensitive information. Check out the imdb API.
Today we'll use FastAPI framework to build our first web API. FastAPI is written in Python, and is just one of the python web frameworks. Two of the more known python frameworks would be Django and Flask.
Let's get to it!
What we'll cover:
Prerequisites
If you just want to read, then you can just follow along. If you want to code along, here's what we're going to need:
- Python installed on your machine. If you're on linux, it's already installed :)
- A virtual environment. It's not required, but it's good practice. Run the following command to install:
sudo apt install python3-pip && sudo pip3 install virtualenv- A code editor. I'm using VS Code. You can download it here. You'll need the python extension for more productivity. Just click on the Extensions > Search 'Python', and ensure you install the Microsoft's version.

What is FastAPI?
FastAPI is a high performance, easy to learn, fast to code, ready for production python framework. It first showed up in 2019, created by Sebastian Ramírez. It improves the deveoper experience by having self-documenting APIs, and at the same time reduces boilerpate code.
Hello World in FastAPI
Let's see how easy it is to use FastAPI:
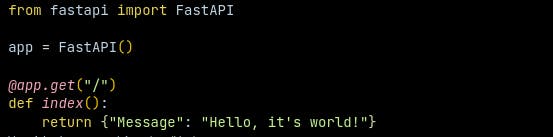
Here's what I've done:
from fastapi import FastAPIimports the FastAPIapp = FastAPI()creates an instance of fastapi for us to use@app.get("/")is a decorator that uses the http get method from FastAPI.def index()<- Here we define a method that returns a hello world message
FastAPI basics
Most important things to understand while working with FastAPI:
- Typehints
 Although typehints are built into python, they're crucial when working with FastAPI. As you can see in the example above, you will need to explicitely define the data type for all your variables ie:
 name: str. This will apply for all data types say str, int, list, dict etc.
- Path and Path Parameters
 The
The "/books" inside the parenthesis is a path. This means that when user goes to the path say example.com/books, they will be accessing this "/books" resource path
 The
The "{book_id}" is called a path parameter. Path parameters are enclosed inside of curly braces {}. They offer a way to control specific resources. Say for instance you want to get a specific book, then you might want to add a path parameter with that book's id.
Query Parameters
 These are not required. All parameters outside of the path are considered as query parameters.
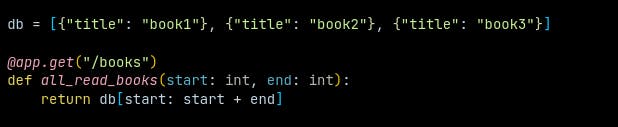
Note the
These are not required. All parameters outside of the path are considered as query parameters.
Note the start: intandend: inton theall_read_booksfunction. Those are the two query parameters that our API will expect. The query is represented in a key-value pair, comes after a question mark?and is separated by an ampersand&. In our case, the query would be something similar tohttps://example.com/books/?start=0&end=12Request Body
A request body is what the client will send to our API.
In our example, we've created a Book class, and parsed it to the add_a_book function as a book parameter. This will send an instance of a Book with the post method to our API.
Build a working API
Now let's build a working API in FastAPI:
- Create an empty directory anywhere:
mkdir fastapi && cd fastapi - Create a virtual environment and activate it:
virtualenv venv && source venv/bin/activate - Install FastAPI:
pip install fastapi uvicorn Now open the in your editor:
code .Let's write our first endpoint! Get all books. Copy the code below:
from fastapi import FastAPI

app = FastAPI()

db = []

@app.get("/books")
def get_all_books():
    return db
Line 3 creates an empty list to act as our in-memory data storage. the /books path will return whatever is inside the db. Save the file as main.py (This is important)
- To view it, go back to the terminal window and run the following command:
uvicorn main:app --reload
This calls the app variable inside of the main.py script. The --reload ensures that the server will refresh each time we save the file.
Now head over to localhost:8000/books
You should see something similar to this:

- Add a book to our
db:
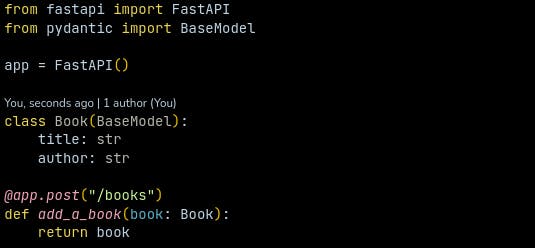
First we'll need a Book. For that, we'll create a Book class to act as our Response Model. Import BaseModel:
from pydantic import BaseModel
Add the Book class and add_a_book function:
class Book(BaseModel):
    title: str

@app.post("/books")
def add_a_book(book: Book):
    return db.append(book)
Here, we send the book request (Our book title) to the API.
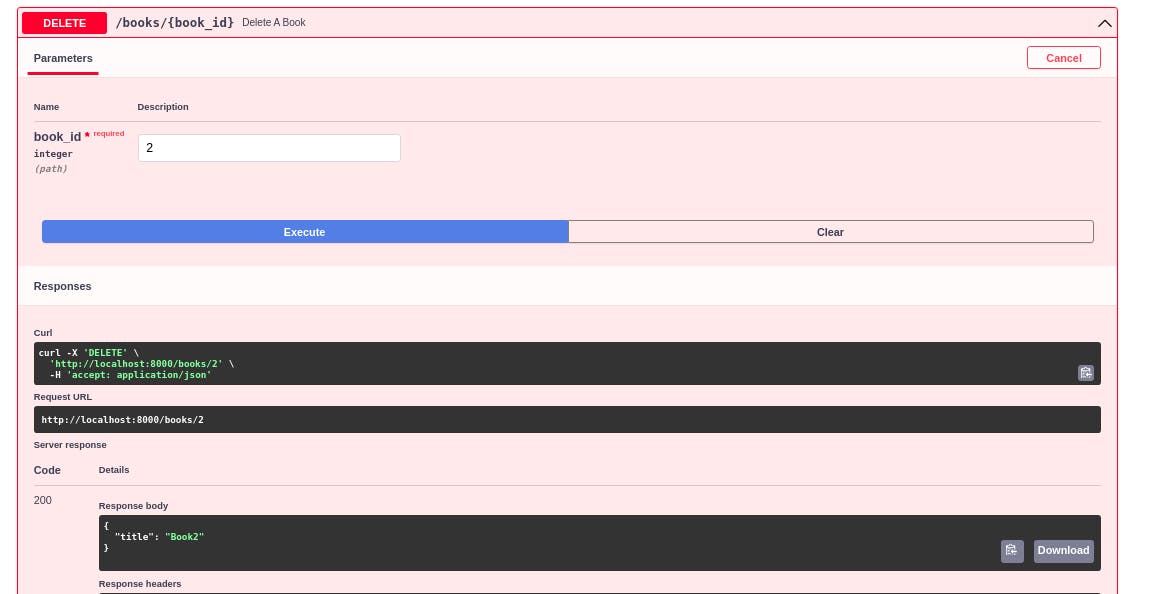
- Delete a
Bookfromdb:
To delete a book, we'll just use an ordinary pop() method
Notice we're usingbook_idas a path parameter:
@app.delete("/books/{book_id}")
def delete_a_book(book_id: int):
    return db.pop(book_id)
- Get a specific
BookTo get one book, we'll need thebook's id on the list. Here's how to do it:
@app.get("/books/{book_id}")
def get_a_book(book_id: int):
    return db[book_id]
Here we use the list index as our book_id and parse it as our path parameter.
Get entire code on my Github or BitBucket repo.
Swagger UI
To test out our API, we'll use the inbuilt documentation for FastAPI. Head over to your browser and open the link http://localhost:8000/docs. You should be greeted by this page:
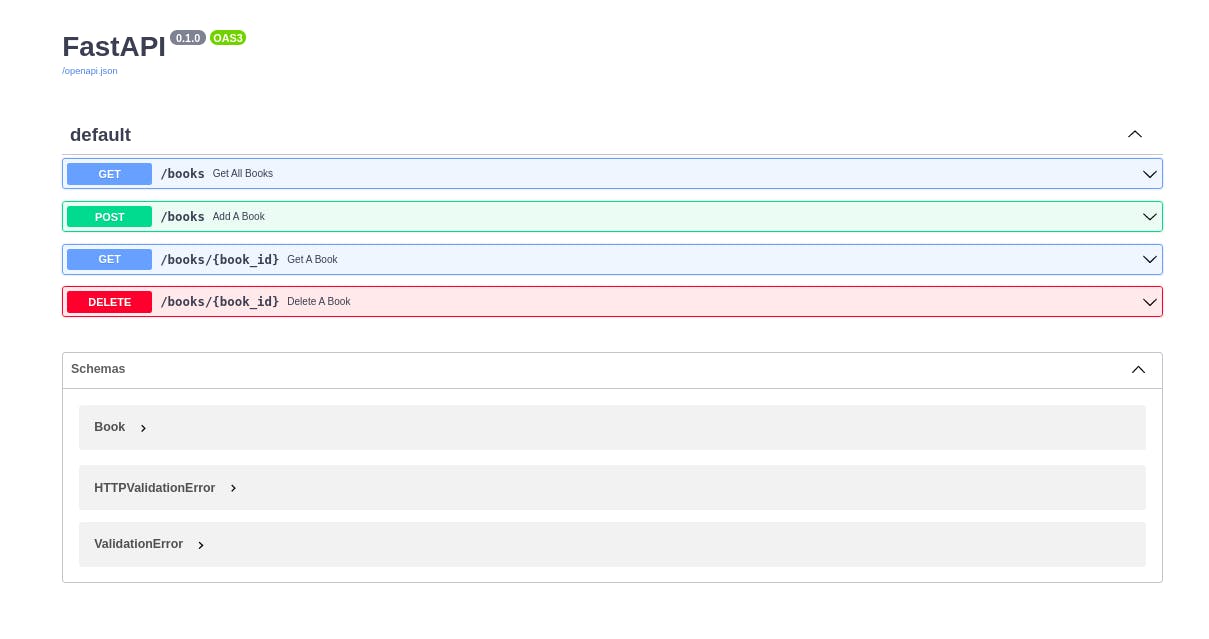
Let's test the methods:
Expand
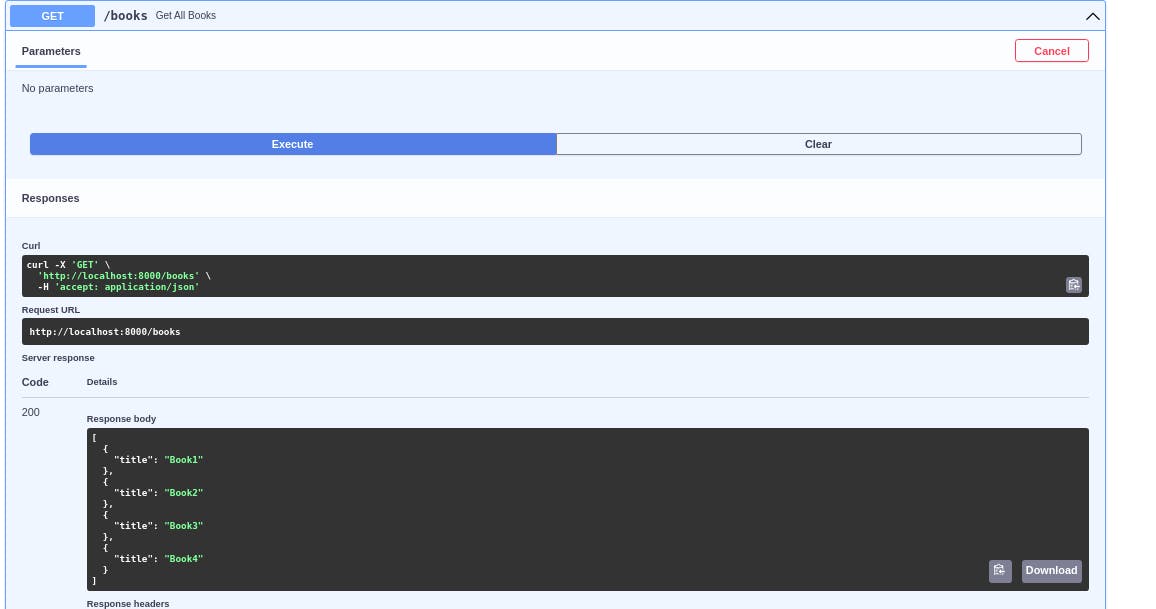
Get All Books, clicktry it outthenExcecute: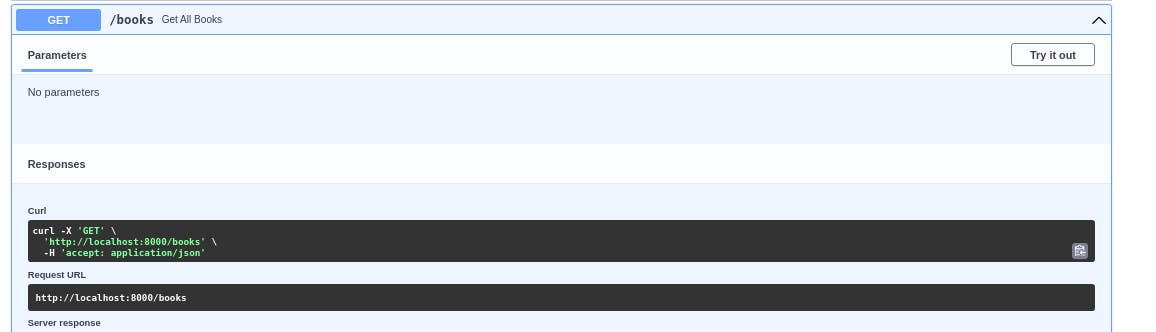
We'll do the same for
Add A Book: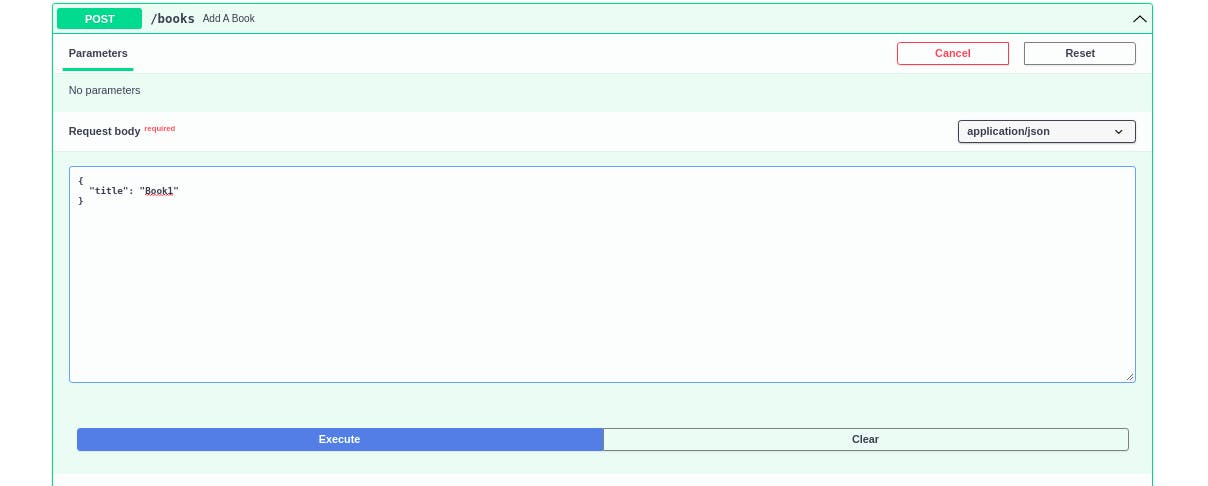 Add several books so that we have something to test with. As you can see, I've added four:
Get A Book, it requires us to enter abook_id, and returns a book in that index in ourdb

Delete A Bookis similar toGet A Book